How To Decorate A Bookshelf For Kids

Winter's nursery was the first and still the only room in the house that is completely decorated. It usually takes me months to put together my vision (and let's be real, months to save the money to do it) but somehow it came together quite effortlessly until I got to the bookshelves.
I don't know what it is about shelves but they always intimidate me and take me hours to figure out what the heck to put on them that's both functional and fun to look at it.
I probably spent four hours putting things on and taking things off but then FINALLY, it dawned on me.
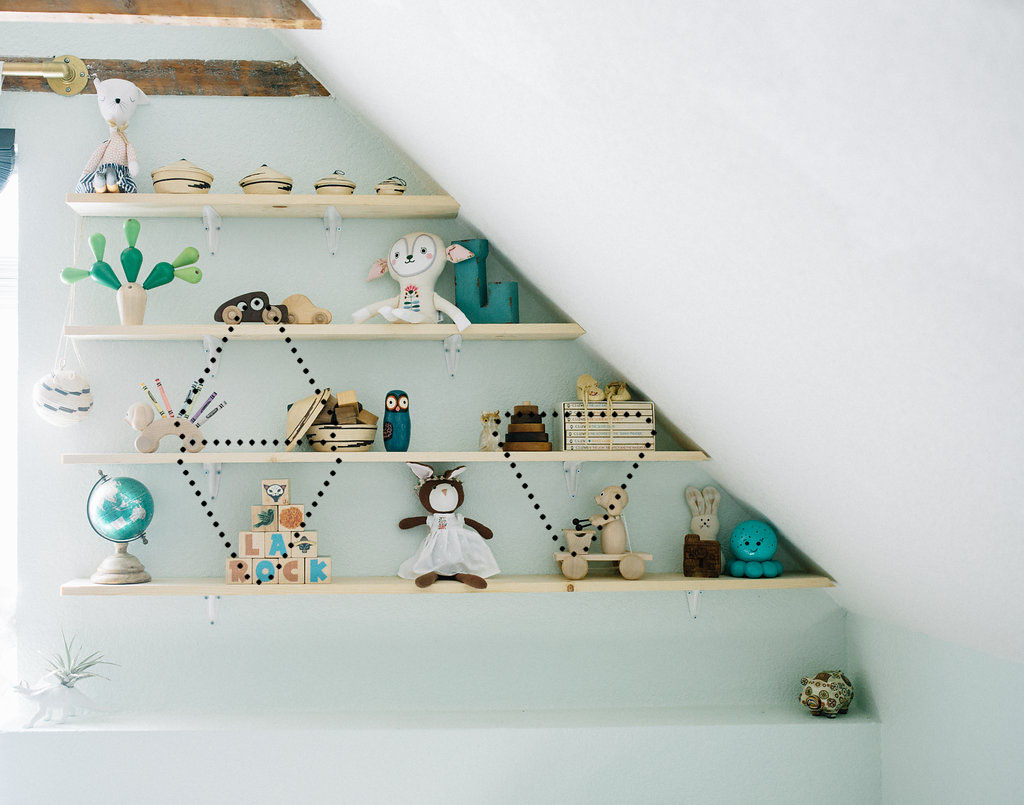
I know in design that the rule of thirds works really well in photography and when I started thinking in terms of thirds or three the shape of a triangle popped into my mind and the rest was history.
The triangle method is so simple and it seriously works like a charm. Here's how you do it:
Step One
Group Your Objects: I find that's much easier to start your design when you have anything arranged by color.


Step Two
Make Your First Triangle: Put up a group of objects on the shelf so that they make a triangle. And don't just limit yourself to right triangles. Try all kinds: obtuse, acute and upside down.


Step Three
Repeat: Repeat the triangle process for the other groups. And don't just limit yourself to right triangles. Try all kinds: obtuse, acute and upside down.


Step Four
Put in filler objects: When a shelf feels bare, start putting on fillers to bring in dimension and keep it interesting. As I did this, I kept in mind why the triangle method worked (because it had three points). So, if I stuck to the rule of three, grouping objects into threes should also work. And it did!


Step Five
Enjoy: Congratulations. You now have learned how it easily and almost painlessly decorate a bookshelf for kids! I hope you enjoyed the tutorial.

To find all the sources for this post, please visit her nursery reveal post (here).
Do you know any fool proof design tips?
Photography by Brittany Renee'